The air filter on your generator is meant to clean out the air being drawn into the carburetor before it’s mixed with fuel and ignited to produce energy. Without this filter, the engine won’t get enough clean air hence will have poor performance.
If you live or work in a dusty region, the filter should be cleaned more frequently. After a while, the air filter loses its ability to filter out the dirt thus needing a change. You should then get the right filter for your type of generator for the best experience.
Below, we provide a guide on how to clean generator air filter and housing. While the procedure is the same for all types of generators, the location, design and size of your generator air filter can differ depending on the brand. Lastly, we detail how to change the air filter to a new one when the need arises.
Cleaning the Air Filter: The Steps
The steps are as follows:
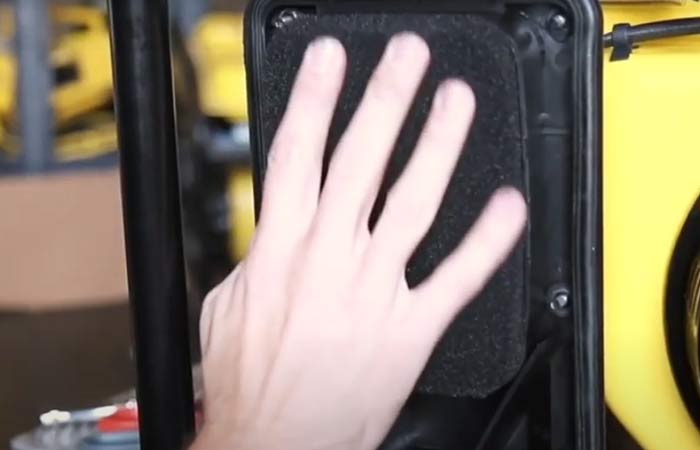
- Locate the air cleaner assembly on your generator. On Champion generators and many others, it’s located to the left of the recoil assembly and is a black rectangular piece.
- Undo the clips on the air conditioner housing with most having two clips at the top and bottom. Remove the housing carefully.
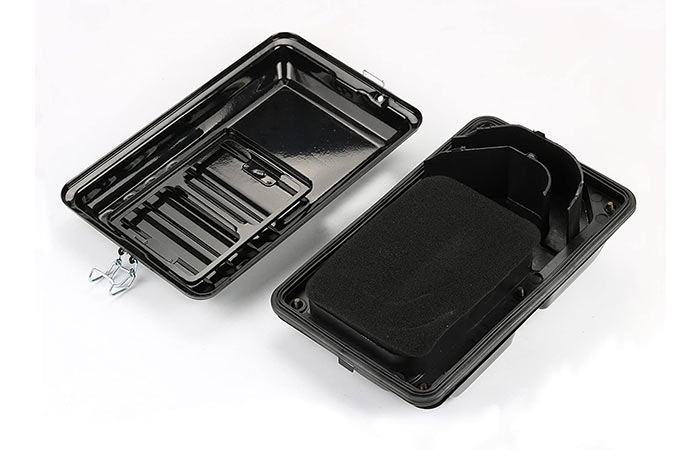
- Remove the foam filter located right under the cover of the housing.
- Clean the foam filter with liquid detergent and clean water until you feel it dry. Squeeze it of the excess water without twisting it.
- Once dry, soak one side of the foam filter with clean engine oil then soak up the excess oil with a piece of clean cloth. The remaining oil shouldn’t drip from the foam filter.
- Place the foam filter into the housing unit with the oiled side facing the engine.
- Finally, replace the air cleaner cover then fasten the clips once again.
Throughout this procedure, ensure you have followed the guidelines of your manufacturer to avoid damaging any part of the generator.
Cleaning the Air Filter Housing: The Steps
Cleaning the air filter alone without cleaning the housing isn’t effective at keeping the filter clean. Dirt will easily get stuck back unto to the foam filter again once the foam is placed into the housing.
To clean the housing, follow these steps:
- Locate the air cleaner assembly unit as in the above steps.
- Undo the clips on the air conditioner cover.
- Remove the foam air filter.
- Remove the metal grate from the air filter housing. It’s usually held into position by two plastic pins. You carefully pull it off the pins in order to remove it.
- After that, remove the three nuts holding the air filter housing in place. The three nuts are: in the middle of the air filter housing, on the top left side of the air filter housing, and at the bottom backside of the air filter. The example used here is for WEN generators and might be slightly different for other generator brands.
- You then detach the rubber hose on the left side of the air filter assembly. You may need a pair of pliers in removing the clamp holding the hose in place before gently pulling it off.
- Remove the rubber hose on the top of the air filter assembly by gently pulling the hose from the housing. You can then remove the whole air filter assembly from the generator.
- Wash it with soapy water then let it air dry until all the water has dried up.
- Slowly and carefully slide the air filter assembly onto the generator. Make sure the alignment and orientation are correct as you do so.
- Reattach the three nuts as follows: one in the middle of the air filter housing, one on the top left side of the air filter housing, and the last one at the bottom on the backside of the air filter housing.
- Correctly plug in each hose. You can use a pair of pliers to securely clamp the hoses unto their correct positions.
- Put back the metal grate into its correct position. You can be guided by the two threads on either side of it. The metal grate plays the important role of keeping the foam filter from being sucked into and damaging the carburetor of the generator.
- Replace the foam filter into its position as stated in the previous series of steps.
- Replace the air filter cover to finish the process.
The same procedure should be followed when replacing the air filter. Only this time, a new air filter will be used instead of returning the old one on it.
Other filter cleaning techniques
The procedure stated above is for a small generator for the home or RV. However, larger generators running on diesel used to power whole houses will utilize other cleaning methods such as the following:
Water under pressure
Pressurized water can be used to clean the air filter at a maximum pressure of 40 PSI (276 kPa). The water should be directed with a nozzle onto the surface of the filter on the clean side in an up and down motion. After that, the same process should be repeated on the dirty side of the air filter. Drying should be done by air. If you have to use hot air, make sure it’s not more than 70°C (160°F).
Cleaning an air filter with water is to be done a maximum of 6 times before changing the filter itself. This is because it damages the filter media with time. Although you might notice some wavy pleats on the filter media, it’s still okay to use it that way.
Air under pressure (with or without vacuum)
In this method, clean, dry air is used to blow dirt out of the air filter. The pressure used shouldn’t go beyond 40 PSI (276 kPa) and the nozzle should not be closer than 2 inches (50mm) to the surface of the air filter.
The compressed air is directed through the filter from the clean side. The nozzles of the air blower should be run up and down the surface of the filter element as it blows the air opposite the nozzle. If there is a vacuum, it should be on the dirty side where it will be sucking in the air and dirt.
Having the nozzle too close to the filter media will damage it and should thus be avoided.
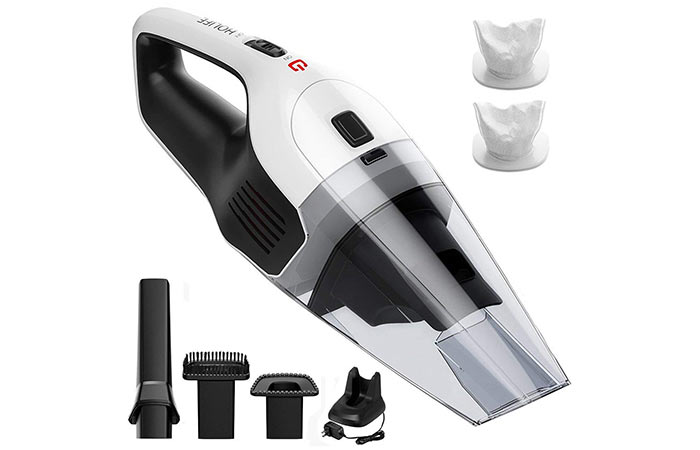
Vacuuming
For this method, you should use a central vacuum supply or standard shop-vacuum supply. You then move the vacuum up and down the dirty side avoiding contact between the vacuum’s nozzle and the surface of the air media.
Non-sudsing detergent
To use this method, you first need to clean the air filter with any of the above methods. You then follow these steps:
- Place the filter in a suitable tank with the open end up and with the water at 37-60°C (100-140°F) and with a non-sudsing detergent.
- Soak the filter for 15 to 30 minutes then agitate the dirt by gently rotating or swaying it around. After that, soak for another 10 minutes.
- Rinse the filter using clean water projected from the clean side until the water runs clean. Air dry it with the air having a maximum temperature of 70°C (160°F).

Given how damaging water is on air filters, this procedure shouldn’t be done more than 6 times before replacing the filter. Be careful not to fully immerse the air filter into the cleaning solution. The force of the water will lead to wavy pleats which aren’t a problem. Also, never reuse the cleaning solution.
What to do after cleaning the air filters
Once done with the cleaning process, do the following before reattaching it back to the generator:
- Take the filter in a well-lit area then inspect all the parts especially the gaskets for cracks and tears.
- Take the filter in a dark room then place a 60-watt light bulb inside it. Rotate the filter slowly to check for holes and weak spots in its media. The defects will be identified with bright spots. If it’s damaged, it’ll need to be replaced and not used again.
- Permanently mark the filter with the cleaning method, date of cleaning and the number of cleanings done on it.
- If you’re not replacing it directly, store it wrapped up in a poly-bag and in a carton box with the details of the filter such as the part number of the element and others.
These aspects also help you get the best out of an air filter.
Important Aspects About Cleaning or Changing Air Filters
Some of the important things to look out for when cleaning and changing air filters for generators and other machines include the following:
- To enjoy the most out of an air filter, always stick to the recommendations of the manufacturer when changing or cleaning it.
- Cleaning air filters reduces their effectiveness and with each time making them worse at air filtration, a few washes can render them useless at the risk of damaging your generator. Some air filters’ effectiveness can reduce as much as 25% just after the first wash. As such, you should consider just buying a new one after about 3 washes.
- If the machine has two air filters, the secondary one should only be replaced and never cleaned. This secondary filter should be replaced after a year of use or when the primary filter has been changed 3 times. Whichever comes first.
- Air filters shouldn’t be cleaned until they look like new as this damages the air filter media rendering them less effective.
- After each cleaning, always inspect the elements of the air filter to check their integrity in filtering the air particles from the air.
- Each time you handle an air filter, you reduce its effectiveness in filtering the air. For this reason, only handle the air filter when it’s absolutely necessary.
- Don’t wait until the filter is out of service to replace it. Rather, replace it as frequently as recommended by the manufacturer even if you think it’s still efficient.
- Cleaning filters is a risky endeavor that should be undertaken with lots of care. Damage to any part of the filter enormously reduces its effectiveness and increases the risk of damage to your machine.
- If you can’t clean the air filter yourself as you’re unsure of what to do, better let an expert handle it than risk damaging the filter and your generator as a result of it.
- Before you clean an air filter, always thoroughly inspect it for damage. If you take note of any damage, don’t clean it. instead, just replace it. This holds true for endplates, gaskets and any other parts of the filter.
- When disposing off any material from the air filter, always do so in an environment-friendly manner.
Keeping these aspects in mind helps you take proper care of your air filters.
What to avoid when cleaning air filters
Some aspects to avoid when cleaning air filters include:
- Don’t scrape the dirt or contaminants off the surface of the media.
- Don’t loosen the dirt from the element by hitting it against a hard surface or hitting it with a tool.
- Never take the foam filter or filter element for cleaning.
These precautions are simply meant to avoid damaging the parts of the air filter.
FAQs
Why is there oil in my air filter on my generator?
It means that the generator has more oil than needed, or that it’s tipped to one side making the level rise too high.
How do I change the air filter in my generator?
You change the air filter by removing the casing, the foam filter then the air filter assembly then replacing it with this process but in the reverse order.
What are the signs of a bad air filter?
The signs of a bad air filter include a misfiring engine, the CHECK ENGINE light is on, reduced power, smell of gas when starting the engine, reduced fuel economy, unusual engine sounds, the filter appears dirty, flames or black sooty smoke coming out of the exhaust pipe and others.
More Generator How-tos & Hacks
- Generator Won’t Start (New & Used): Causes, Troubleshooting & Fixes
- Generator Pull Cord Won’t Retract: Causes & Fixes
- How to Start a Generator: New, Used, With/Out Pull Cord
- Generator Won’t Stay Running: Causes & Fixes
- Generator Running Rough & Not Smoothly-Causes + Fixes
- How to Connect /Hook Generator to House without Transfer Switch
- How to Change Oil in Generator-Step by Step
- How to Fix an Overloaded Generator
- How to make a Generator Quiet as a Cricket for Camping
- 15+ ways to Secure Portable Generators from Theft & Damage
- Portable Generators Safety Tips Checklist
- How to Make Generator Safe for Your Electronics